One tool to rule them all?
When using a modern gateway like Kong some use cases can be achieved in a better way than with traditional gateways. Reason for this is that the old gateways all tried to suck in all components into their heavy weight centralized solutions while a modern stack does not. So those gateways not only try to be a gateway, they also try to be a BI system, a central logging hub, a monitoring tool and so much more.
In a modern stack you should try to avoid such installations but instead follow the rules of “do one thing well” as well as “keep it simple”. For example do not try to find a gateway which has the coolest dashboards in their user interface but instead use dedicated and better tools like for example the ELK stack or very common right now Prometheus and Grafana.
AuthN and AuthZ
But today let’s talk about authentication as well as (sort of) authorization. And if we talk nowadays about authentication for modern APIs there is basically one answer everybody is looking at right now: OpenID Connect with JWT. A few years ago many gateways heavily relied on being the OAuth / OpenID Connect provider for the whole flow - but today basically all existing IdP’s have implemented OpenID Connect and therefore the whole management of keys, tokens and users should not happen in the gateway anymore.
So let’s think about a very typical example: you have decided to have a central location for you IdP (right now I hear KeyCloak the most but you can also think of Azure ID, Auth0, Ping, …) and this is the central point of truth for authentication as well as groups / permissions of the users (including all the fancy things like multi factor authentication and more).
A more traditional setup in a gateway would be to use the IdP for authentication (in Kong Enterprise: the OpenID Connect plugin) and then in the gateway you define per endpoint which groups you want to grant access to the backend system (in Kong this would be the ACL plugin).
This design has two major points for improvement:
- to attach the users to groups they must be existing in Kong so you end up having shadow consumers in the gateway and
- the administrator of the IdP needs to log in to Kong and change groups here if he wants to grant / revoke permissions
How to do it right
Both of this is a bad design descission (even so it works) and the answer is already in the specification of OpenID Connect since the beginning: use groups in the IdP to attach scopes to the users and let the gateway only decide based on the scope being in the JWT or not. This solves both issues at the same time and the administration of users and their permissions are now located where they should be: in the IdP.
💡 the following example will be using the Kong Enterprise Edition as this one includes the needed OpenID Connect plugin
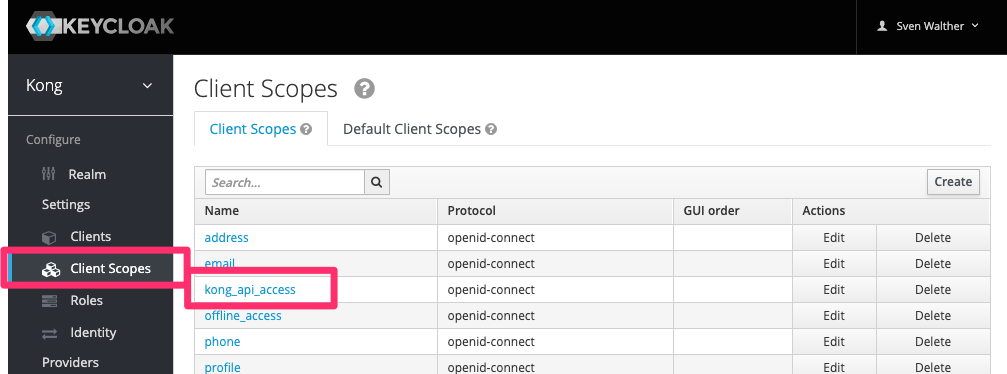
In order to achieve this I want to walk you through a small KeyCloak example now. Within KeyCloak the first thing is creating a new scope, attaching it to a group and then attaching this group to a user:
Keycloak scope creation
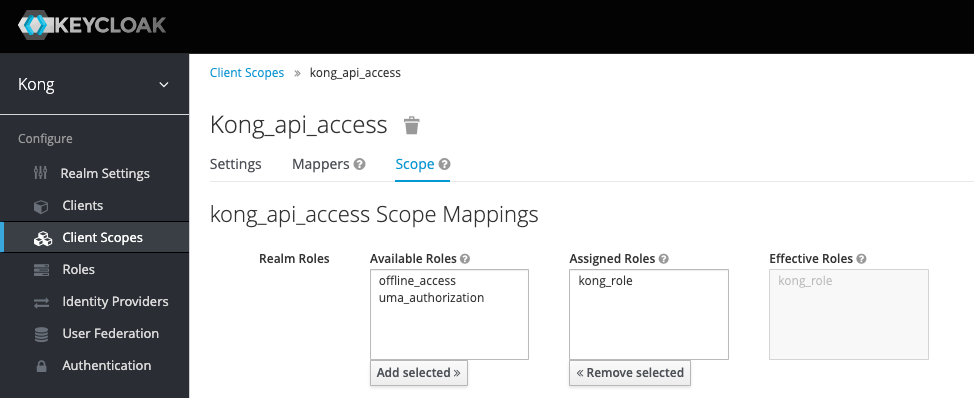
Keycloak scope and role mapping
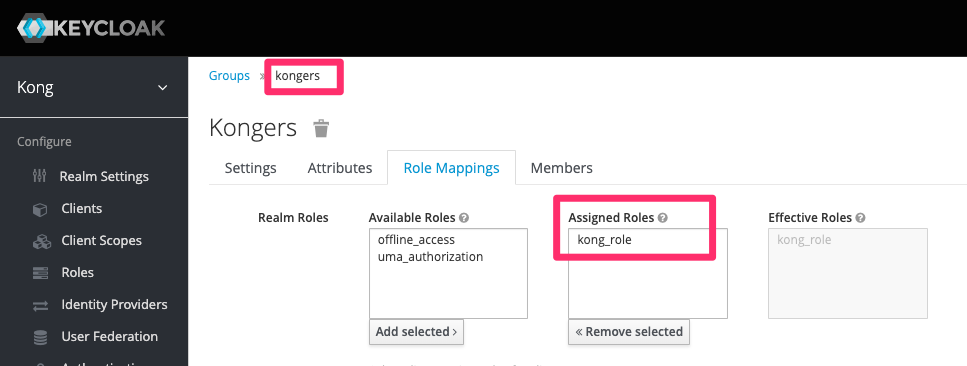
Role to group mapping
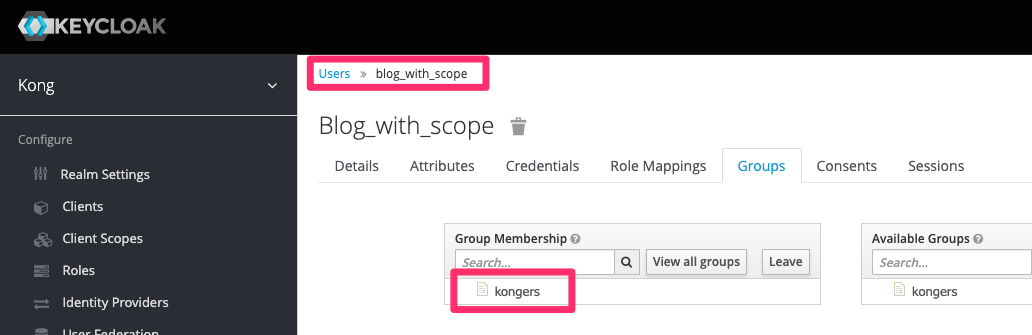
User to group mapping
Kong Enterprise settings
💡 the credentials I am sharing here are public and will work as of today but no guarantee that I keep this KeyCloak with these settings up and running forever
💡 I am using httpie as my command line tool of choice - feel free to use Insomnia, Postman, curl, …. instead
With this set we are now moving over to Kong and set up a small example service and route which we will use to test things out.
Service and route
http POST localhost:8001/services name=openidconnect url=http://httpbin.org/anything
http POST localhost:8001/services/openidconnect/routes name=openidconnectRoute paths=/oidc -f
OpenID Connect plugin
OK, now let’s configure the openid-connect plugin to connect to my KeyCloak:
    http -f localhost:8001/routes/openidconnectRoute/plugins \
      name=openid-connect \
      config.issuer=https://keycloak.apim.eu/auth/realms/kong/.well-known/openid-configuration \
      config.client_id=blog_post \
      config.client_secret=a5186adc-b5e2-4501-85a8-eb19a5e1a2a3 \
      config.ssl_verify=false \
      config.consumer_claim=email \
      config.verify_signature=false \
      config.redirect_uri=http://localhost:8000/oidc \
      config.consumer_optional=true \
      config.scopes_required=kong_api_access
Let’s have a look at the parameters.
config.issuer, config.client_id, config.client_secret, config.ssl_verify and config.verify_signature are settings specific to my KeyCloak server installation.
The config.redirect_uri depends on your Kong installation (I just have used to defaults if you install it locally).
The most interesting settings in our scenario are config.consumer_optional and config.scopes_required.
config.consumer_optional defines that the OpenID Connect plugin will authorize access even so there is no matching consumer in our Kong installation (so we don’t need shadow consumers anymore).
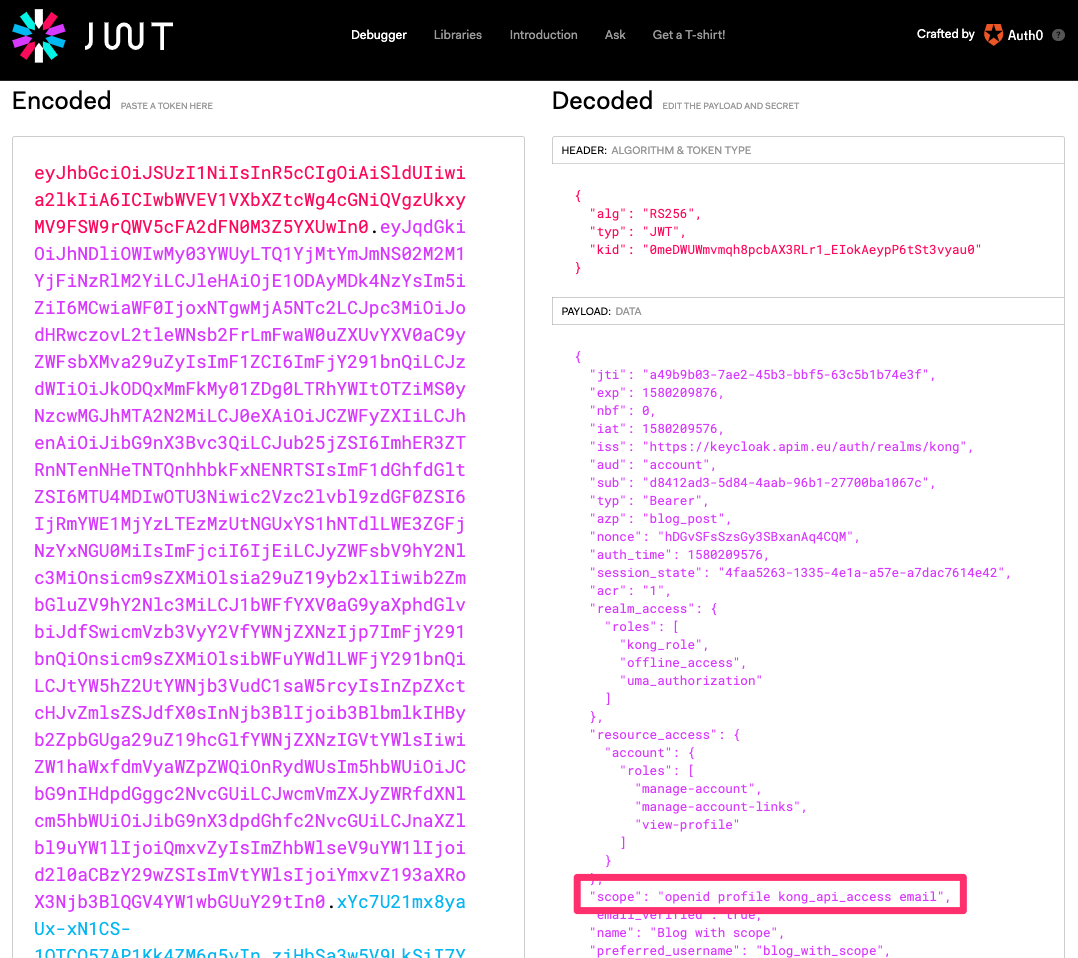
config.scopes_required is the major one: we are defining that in the JWT returned by KeyCloak the scope kong_api_access must be included. Only then we will pass the request to the upstream (backend). See above in the KeyCloak screenshots that this is the one we defined and attached there to a group.
Let’s try it
For testing purposes I have two example users in my KeyCloak you can use to try it out:
- Blog_with_scope / veryComplexPa55word
- Blog_without_scope / veryComplexPa55word
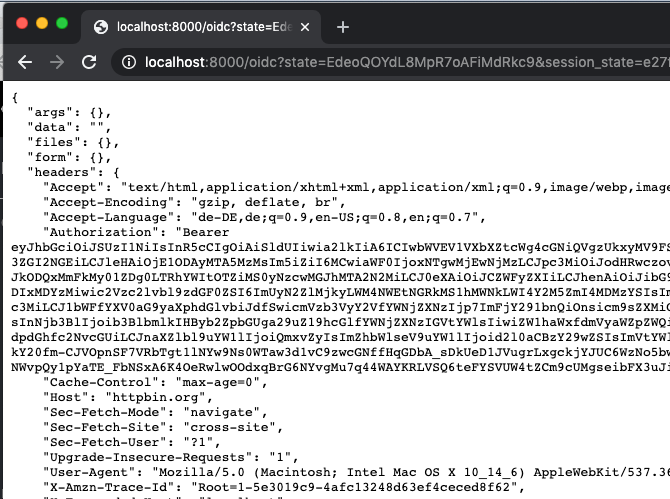
Open a new browser window (either in incognito mode or with all caches empty) and navigate to http://localhost:8000/oidc. You will notice that the user Blog_with_scope will get access.
But Blog_without_scope is denied even so he is also a valid user in KeyCloak.
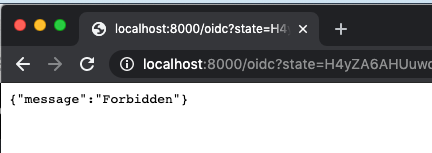
The user without the scope will produce a log entry like required scopes were not found [ openid, profile, email ] in your Kong logs.
Last but not least let’s have a look at the JWT for Blog_with_scope which includes the scope:
Outlook
The Outlook has become true: Find another blog post in this Kong series on how to use JWT claims and rate-limiting here.
Original Outlook:
The above scenario is great for the binary decision on access yes/no. You might wonder how you can now add consumer specific settings (rate limiting to just mention a very common one). There are multiple ways to achieve this (once again creating shadow consumers per user, having consumers as groups or using a header) but this is out of scope of today’s blog post (which is already longer than it should be).
Just drop me an email, a Twitter mention or however you want to reach out to me and if I get enough requests I’ll add a second blog post about this and will link it here.